Streaming has evolved into a massive career opportunity for creators. Whether you’re an aspiring VTuber or a professional streamer, combining VTube Studio with OBS Studio is the ultimate way to deliver polished and engaging broadcasts on Twitch and YouTube.
At GreatOverlays, we help VTubers and content creators enhance their streams with custom overlays, animated alerts, transitions, and branding packs designed specifically for VTuber streaming setups. In this guide, you’ll learn how to master VTube Studio + OBS Studio, configure your Live2D model, and make your streams stand out with professional design.
1. Setting Up VTube Studio for Streaming
Before connecting VTube Studio to OBS, you need to configure your Live2D model.
- Download VTube Studio from Steam or the official website.
- Import your Live2D model and adjust the facial tracking sensitivity.
- Fine-tune eye, lip-sync, and body tracking for smooth expressions.
- Add VTuber backgrounds to match your brand or theme.
Pro Tip: Keep your setup minimal but clean. Later, you can enhance the visuals with GreatOverlays VTuber overlays for professional branding.
2. Connecting VTube Studio to OBS Studio
Now that your model is ready, let’s link it with OBS.
- Open OBS Studio and create a new scene.
- Add a Game Capture or Window Capture source.
- Select VTube Studio from the dropdown.
- Resize and position your VTuber avatar on screen.
With this setup, you can combine your Live2D model with stream overlays, alerts, and transitions inside OBS.
3. Optimizing OBS Settings for VTubers
For smooth performance, OBS must be configured properly.
- OBS Bitrate: 4500–6000 kbps for 1080p @ 60FPS.
- OBS FPS: Use 30FPS for stability, or 60FPS if your PC can handle it.
- OBS Resolution: 1920×1080 (Full HD) or 1280×720 for mid-tier PCs.
- OBS Audio Settings:
- Mic: 44.1 kHz or 48 kHz sample rate.
- Use OBS filters like Noise Suppression, Compressor, and Limiter for professional sound.
4. Mastering Scenes & Overlays
Scenes are the backbone of your VTuber stream.
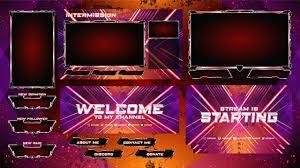
- OBS Scenes Setup: Create layouts for gameplay, chatting, and intermissions.
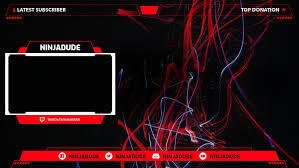
- VTuber Overlays: Frame your Live2D avatar, chat, and webcam (if used).
- VTuber Alerts: Celebrate new followers, subscribers, or donations with animations.
- VTuber Transitions: Use stingers or fades to move smoothly between scenes.
With GreatOverlays VTuber packs, you get pre-designed overlays, alerts, and transitions that perfectly match your streaming style.
5. VTuber Branding & Design
Your stream design is what sets you apart. Branding creates recognition and trust.
- VTuber backgrounds: Customizable themes for gameplay or chatting.
- VTuber panels: Organize info like rules, socials, and schedules on Twitch.
- VTuber chat overlays: Display live chat on screen for engagement.
- Stream branding: Keep fonts, colors, and layouts consistent.
With GreatOverlays branding bundles, you don’t have to design from scratch—just install and stream with pro visuals.
6. Using OBS Hotkeys for Smooth Control
OBS hotkeys let you control your stream like a pro.
- Switch between VTuber scenes instantly.
- Trigger stinger transitions with one key.
- Toggle overlays and alerts without clicking.
- Start/stop stream or recording with shortcuts.
This makes live streaming seamless and prevents awkward pauses.
7. Enhancing Audience Engagement
To grow your audience, you must keep viewers engaged.
- Interactive VTuber Alerts: Highlight donations, subs, and followers in real time.
- Chat Highlights: Showcase active fans on-screen.
- Intermission Screens: “Starting Soon” and “Be Right Back” screens keep viewers from leaving.
- Polls & Q&A: Use YouTube/Twitch features to engage directly.
Pro streamers use GreatOverlays interactive alerts to keep audiences entertained throughout the session.
8. Stream Tips for VTubers
- Always test your OBS mic settings before going live.
- Keep your stream packs lightweight for smooth performance.
- Practice expressions and gestures in VTube Studio for natural delivery.
- Record a few practice sessions with OBS recording before your first live stream.
- Use overlays and panels to maintain a professional VTuber stream design.
9. Twitch & YouTube VTuber Setup Differences
- Twitch Streaming:
- Twitch overlays & panels matter more since your channel page is highly customizable.
- Focus on alerts (subs, bits, raids) to boost interaction.
- YouTube Streaming:
- Thumbnails and titles affect audience growth.
- Super Chat and donation alerts should be clear and visible.
Both platforms benefit from GreatOverlays VTuber overlay packs that adapt to Twitch and YouTube.
10. Common Mistakes to Avoid
- Using poor-quality overlays that clutter your screen.
- Ignoring audio quality (viewers will leave fast).
- Forgetting intermission screens during breaks.
- Overloading OBS with too many plugins.
- Inconsistent branding across Twitch, YouTube, and socials.
FAQs – VTube Studio + OBS Streaming
Q1: Can I stream directly from VTube Studio?
No, you need OBS Studio or another streaming software for overlays and alerts.
Q2: Do overlays affect FPS in OBS?
Optimized overlays (like those from GreatOverlays) won’t hurt performance.
Q3: What’s the best OBS setting for VTubers?
1080p, 60FPS with 4500–6000 kbps bitrate for smooth output.
Q4: How do I keep my audience engaged as a VTuber?
Use interactive alerts, branded overlays, and chat highlights.
Q5: Do I need a powerful PC to run VTube Studio with OBS?
A mid-range PC with a good GPU works fine. Lower resolution/FPS if you experience lag.